Linux is one of the world’s most powerful and popular operating
system. Linux operating system was developed by Linus Benedict
Torvalds at the age of 21. At present there are more than 300
flavors of Linux available and one can choose between any of them
depending on the kind of applications they want. Linux is a freeware and generally speaking its free from Virus and other malware infections.
Transparent Huge Pages (THP) is a Linux memory management system that reduces the overhead of Translation Lookaside Buffer (TLB) lookups on machines with large amounts of memory by using larger memory pages.
Transparent Huge Pages are by default enabled in CentOS / RHEL 8.
Database workloads often perform poorly with THP enabled, because they tend to have sparse rather than contiguous memory access patterns.
Therefore, sometimes it is required that, you should disable Transparent Huge Pages on your Linux operating system.
Disable Transparent Huge Pages:
Check the current status of Transparent Huge Pages.
# cat /sys/kernel/mm/transparent_hugepage/enabled
[always] madvise never
THP are currently enabled in your Linux operating system.
To disable Transparent Huge Pages, you have to edit GRUB boot menu. For this purpose, edit the GRUB configuration file in vim text editor.
# vi /etc/default/grub
Locate GRUB_CMDLINE_LINUX and append "transparent_hugepage=never" at the end of that line.
You have disabled Transparent Huge Pages on your Linux operating system. But you are also required to configure tuned service as well.
Wednesday, May 3, 2023
How to Take ‘Snapshot of Logical Volume and Restore’ in LVM
LVM Snapshots are space-efficient point-in-time copies of lvm volumes. It works only with lvm and consumes the space only when changes are made to the source logical volume to snapshot volume. If the source volume has huge changes made to the sum of 1GB the same changes will be made to the snapshot volume. It is best to always have a small size of changes for space efficiency. In case the snapshot runs out of storage, we can use lvextend to grow. And if we need to shrink the snapshot we can use lvreduce.
Take a Snapshot in LVM
If we have accidentally deleted any file after creating a Snapshot we don’t have to worry because the snapshot has the original file which we have deleted. It is possible that the file was there when the snapshot was created. Don’t alter the snapshot volume, keep it as it is while the snapshot is used to do a fast recovery.
Snapshots can’t be used as a backup option. Backups are Primary Copies of some data, so we cant use snapshots as a backup option.
Operating System – CentOS 6.5 with LVM Installation
Server IP – 192.168.0.200
Step 1: Creating LVM Snapshot
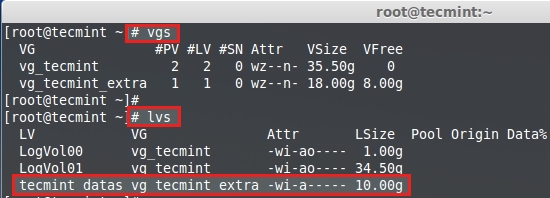
First, check for free space in the volume group to create a new snapshot using the following ‘vgs‘ command.
# vgs
# lvs
Check LVM Disk Space
You see, there is 8GB of free space left in the above vgs output. So, let’s create a snapshot for one of my volume named tecmint_datas. For demonstration purposes, I am going to create only 1GB snapshot volume using the following commands.
Now, list the newly created snapshot using the following command.
# lvs
Verify LVM Snapshot
You see above, a snapshot was created successfully. I have marked with an arrow where snapshots originate from where its created, It’s tecmint_datas. Yes, because we have created a snapshot for tecmint_datas l-volume.
Check LVM Snapshot Space
Let’s add some new files into tecmint_datas. Now volume has some data around 650MB and our snapshot size is 1GB. So there is enough space to back up our changes in snap volume. Here we can see, what is the status of our snapshot using the below command.
# lvs
Check Snapshot Status
You see, 51% of snapshot volume was used now, no issue for more modification in your files. For more detailed information use the command.
# lvdisplay vg_tecmint_extra/tecmint_data_snap
View Snapshot Information
Again, here is a clear explanation of each point highlighted in the above picture.
Name of Snapshot Logical Volume.
Volume group name currently under use.
Snapshot volume in read and write mode, we can even mount the volume and use it.
A time when the snapshot was created. This is very important because a snapshot will look for every change after this time.
This snapshot belongs to the tecmint_datas logical volume.
A logical volume is online and available to use.
Size of Source volume which we took a snapshot of.
Cow-table size = copy on Write, which means whatever changes were made to the tecmint_data volume will be written to this snapshot.
Currently, the snapshot size used, our tecmint_datas was 10G but our snapshot size was 1GB which means our file is around 650 MB. So what is now in 51% if the file grows to 2GB size in tecmint_datas size will increase more than the snapshot allocated size, sure we will be in trouble with a snapshot. That means we need to extend the size of the logical volume (snapshot volume).
Gives the size of the chunk for a snapshot.
Now, let’s copy more than 1GB of files in tecmint_datas, let’s see what will happen. If you do, you will get an error message saying ‘Input/output error‘, which means out of space in the snapshot.
Add Files to Snapshot
If the logical volume becomes full it will get dropped automatically and we can’t use it anymore, even if we extend the size of the snapshot volume. It is the best idea to have the same size as Source while creating a snapshot, tecmint_datas size was 10G, if I create a snapshot size of 10GB it will never overflow like above because it has enough space to take snaps of your volume.
Step 2: Extend Snapshot in LVM
If we need to extend the snapshot size before overflow we can do it using.
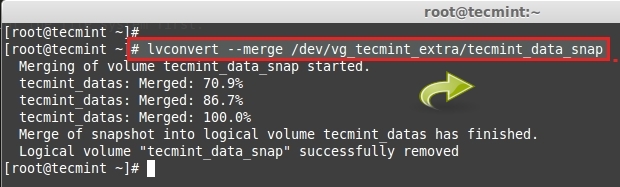
After the merge is completed, the snapshot volume will be removed automatically. Now we can see the space of our partition using the df command.
# df -Th
Check the Size of the Snapshot
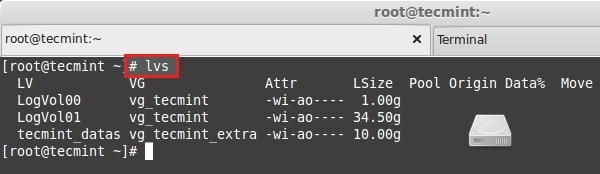
After the snapshot volume is removed automatically. You can see the size of the logical volume.
# lvs
Check the Size of the Logical Volume
Important: To Extend the Snapshots automatically, we can do it using some modifications in the conf file. For manual, we can extend using lvextend.
Open the lvm configuration file using your choice of editor.
# vim /etc/lvm/lvm.conf
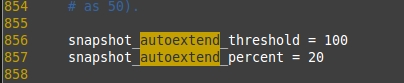
Search for the word autoextend. By default, the value will be similar to below.
LVM Configuration
Change the 100 to 75 here, if so auto extend threshold is 75 and the auto-extend percent is 20, it will expand the size by 20 Percent
If the snapshot volume reaches 75% it will automatically expand the size of the snap volume by 20% more. Thus, we can expand automatically. Save and exit the file using wq!.
How to install Google Chrome web browser on Ubuntu 22.04 Jammy Jellyfish
Google Chrome is an open-source and free web browser used by a large community of computer users. It is a cross-platform and secure browsing application launched and maintained by Google. It has a fast browsing speed.
Google Chrome is a famous and widely used search engine worldwide. It is available in 47 languages and provides the facility of translation in almost 52 languages.
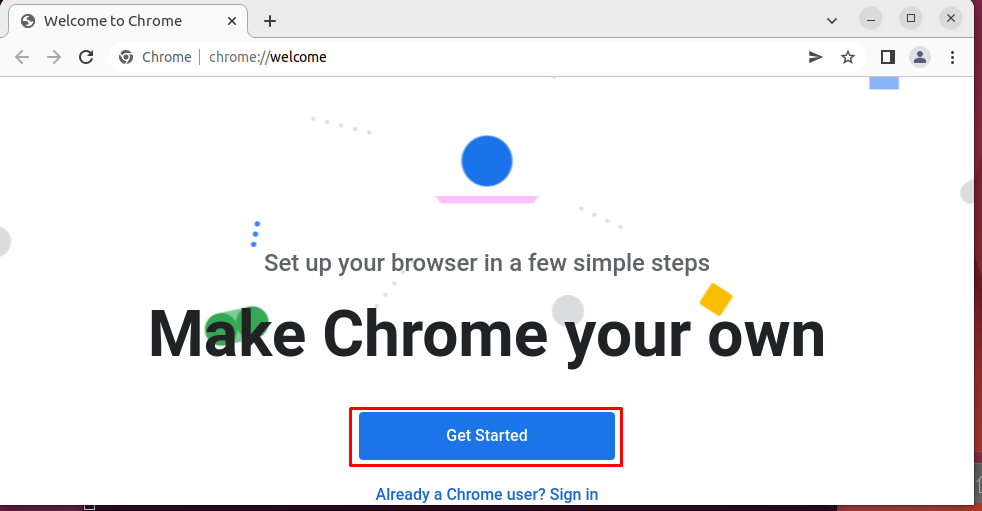
This descriptive write-up will teach you to install Google Chrome on Ubuntu 22.04.
Install Google Chrome from Deb Package
Install Google Chrome using the Google repository
How to Remove Google Chrome From Ubuntu 22.04?
Method 1: Install Google Chrome from deb package
Ubuntu doesn’t have the Google Chrome packages in its default repository. However, Chrome can be installed on Ubuntu using the deb package. For this purpose, follow the below-mentioned step-by-step process.
Step 1: Download deb package
Top 10 Linux Distros
Loaded: 63.71%
Remaining Time -4:50
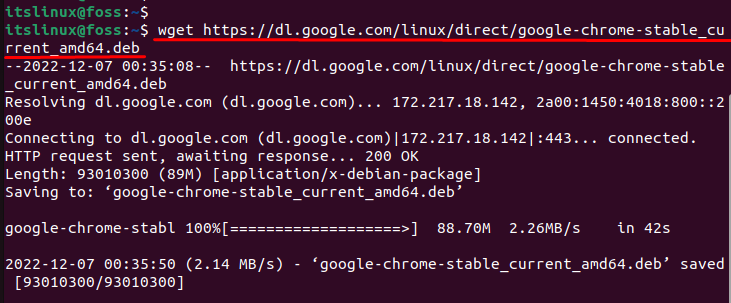
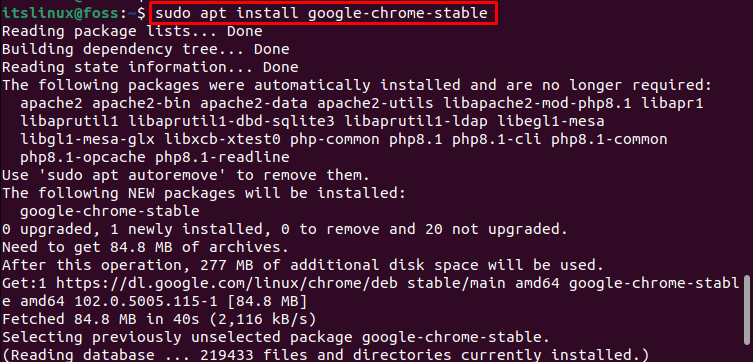
To download the deb package of Google Chrome, type and run the following command in terminal:
The deb package of the stable version of Google Chrome is downloaded successfully.
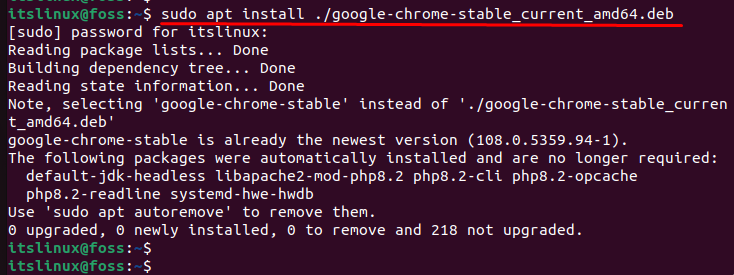
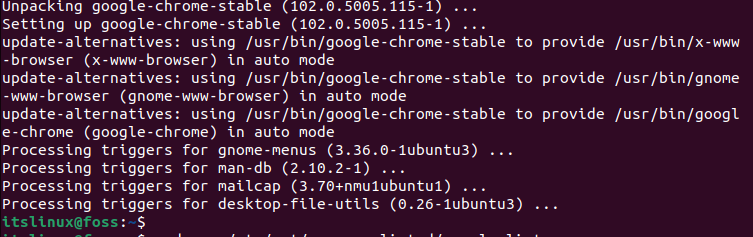
Step 2: Install Google Chrome
You can use the apt/dpkg command to install Chrome from the Debian package file. In our case, the following command will install Chrome on Ubuntu 22.04: