Wednesday, January 30, 2019

configure network in rescue mode and recover data

Configure network in rescue mode and recover data

Boot from Live CD and Choose to go to Rescue System.

By default /mnt/sysimage would be mounted and will get shell to work on.

Or

Log in as root.  You should now be at a rescue prompt.

Mount the filesystem you wish to copy data from:

  mount <device> <mountpoint>
If you run into problems with this, it's likely a driver issue or corrupt filesystem.  Check to see if there is another TID that addresses the issue you are seeing.

View the available network devices with ifconfig -a.

Use ifconfig to configure the network devices as follows:

  ifconfig <network device> netmask <netmask> <ip address>

Example:
 ifconfig eth0 netmask 255.255.255.0 192.168.1.1

NOTE: If you get an error that it can't assign the address, and you're sure the address is available, try it again.
If multi-subnet communication is needed, you'll need to configure the default route with route:

  route add default gw <gateway>You should now be able to use TCP/IP communication. 

You can verify the configuration with:

  ipconfig  netstat -r

The next step is to mount an NFS network share.  Because you are root, your remote filesystem will have to allow root to mount it.  The NFS server will need to use options no_root_sqash and rw for root to be able to copy the data to it.

Note: Try to mount the share with in the same network IP address. 

mount -t nfs <serverip>:<sharepoint> <mountpoint>Example:

 mount -t nfs 192.168.1.50:/var/nfsshare /mnt

NFS Server's /etc/exports example:

 /var/nfsshare *(rw,no_root_squash,sync)

You should now be able to copy the data across the network from rescue mode.

Monday, January 28, 2019

CentOS / RHEL 6 : How to rebuild initrd Initial Ramdisk Image

Procedure

1. It is recommended you make a backup copy of the initrd in case the new version has an unexpected problem:
# cp /boot/initramfs-$(uname -r).img /boot/initramfs-$(uname -r).img.bak
# ll /boot/initramfs-$(uname -r).img*
-rw-r--r--. 1 root root 16209434 Oct 11 14:43 /boot/initramfs-2.6.32-358.el6.x86_64.img
-rw-r--r--. 1 root root 16209434 Apr  9 07:38 /boot/initramfs-2.6.32-358.el6.x86_64.img.bak
2. Now rebuild the initramfs for the current kernel version:
# dracut -f
3. If you are in a kernel version different to the initrd you are building (also if you are in Rescue Mode) you must specify the full kernel version, including architecture:
# dracut -f /boot/initramfs-2.6.39-400.17.1.el6.x86_64.img 2.6.39-400.17.1.el6uek.x86_64
The -f option will force an overwrite of any existing initial ramdisk image at the path you have specified

Working with Backups

As mentioned previously, it is recommended that you take a backup of the previous initrd in case something goes wrong with the new one. If required, it is possible to create a separate entry in /boot/grub/grub.conf for the backup initial ramdisk image, to conveniently choose the old version at boot time without needing to restore the backup. This example configuration allows selection of either the new or old initial ramdisk image from the grub menu :
title Red Hat Enterprise Linux (2.6.32-358.el6.x86_64)
root (hd0,0)
kernel /vmlinuz-2.6.32-358.el6.x86_64 ro root=LABEL=/ 
initrd /initramfs-2.6.32-358.el6.x86_64.img
title Red Hat Enterprise Linux w/ old initrd (2.6.32-358.el6.x86_64)
root (hd0,0)
kernel /vmlinuz-2.6.32-358.el6.x86_64 ro root=LABEL=/ 
initrd /initramfs-2.6.32-358.el6.x86_64.img.bak
Alternatively, you can enter edit-mode in grub if you need to choose the old initrd and did not make a separate entry in grub.conf before rebooting. To do so:
– If grub is secured with a password, press p and enter the password.
– Use the arrow keys to highlight the entry for the kernel you wish to boot.
– Press e for edit.
– Highlight the initrd line and press e again.
– Change the path for the initrd to the backup copy you made (such as /initramfs-2.6.32-358.el6.x86_64.img.bak)
– Press Enter to temporarily save the changes you have made
– Press b for boot

Recovering your Linux server with a Knoppix rescue disk

Recovering your Linux server Recovering your Linux server with a Knoppix rescue disk

  •  

Learn how to recover data on your Linux server if it doesn't boot properly using Knoppix, and how to mount the Linux file systems on your server with step-by-step instructions. How to troubleshoot and interpret server data from the fdisk -l command is provided.

Among the many positive aspects of working with Linux, one is the excellent recovery methods. If your server doesn't boot properly, you can still access everything on it using a recovery disk. Here you will learn how to do this using Knoppix. This article doesn't focus on a particular version of Knoppix, and will work on almost all Linux distributions.
Booting your server using a Knoppix rescue CD is easy. Just put the disk in your server's optical drive and restart the server, next the Knoppix operating system starts loading automatically. But it doesn't immediately give you access to the files on your hard drive. You have to mount all file systems on your server yourself -- assuming you can still mount them. The procedure that is described in this article helps you in fixing boot problems that are not caused by file system errors. If your server's file systems have errors that prevent them from being mounted, the procedure described in this article will help you find a solution, but there may be additional steps required.
Mounting the Linux file systems
Knoppix on Linux
Expert Answer: Testing a live CD distro for use in small business

To access the root file systems on your server using a Knoppix rescue CD, you'll have to mount it. This is also true for other file systems on your server. When using a rescue system, you'll have to mount the root directory on a temporary directory. Most distributions have a directory /mnt which exists for this purpose, so it's a good idea to use it and mount your file system on it. But, there is a potential problem: most utilities assume that your configuration files are in a very specific directory; if your distribution is looking for /boot/grub/menu.lst for instance, the tools may be incapable of understanding that it is in /mnt/boot/grub/menu.lst instead. Therefore, you need to make sure that everything that is mounted on /mnt, is presented to the operating system as mounted directly in the / directory. The following procedure shows you how to do that.
  1. Boot your computer, using the Knoppix CD. You'll see the Knoppix welcome screen next. From here, press Enter to start loading Knoppix.
  2. While loading, Knoppix will wait a while to show you all available languages. If you don't select anything, English is started automatically. Once completely started, you'll get access to the Knoppix desktop.
  3. To restore access to your server, you'll need to open a terminal window from Knoppix. By default, after opening a terminal window you'll get the access permissions of an ordinary user. To be able to repair your server, you need root permissions. You'll get them using the sudo su command.
  4. Now use the mount command. This command shows you that currently no file systems are loaded at all, but everything you see is in a RAM drive.

    Click on image for larger version
    By default, Knoppix loads RAM disks only.
  5. In case you don't know exactly how storage in your server is organized, you'll need to check what partitions and disks are used. The fdisk -l command gives a good start for that. This command shows you all disks that are available on your server (also if they are LUN's offered by a SAN), and it will show you which partitions exist on these disks. The disk names typically start with /dev/sd (although other names may be used), and are followed by a letter. The first disk is /dev/sda, the second disk is /dev/sdb and so on. On the disks, you'll find partitions that are numbered as well. For instance, /dev/sda1 is the first partition on the first disk on your server. Here is an example of what a typical disk layout may look like:
    Use fdisk -l to show the current disk layout of your server.
    ilulissat:/ # fdisk -l
    Disk /dev/sda: 8589 MB, 8589934592 bytes
    255 heads, 63 sectors/track, 1044 cylinders
    Units = cylinders of 16065 * 512 = 8225280 bytes
    
       Device Boot      Start         End      Blocks   Id  System
    /dev/sda1   *           1          13      104391   83  Linux
    /dev/sda2              14          30      136552+  82  Linux swap / Solaris
    /dev/sda3              31         553     4200997+  83  Linux
    
  6. Now it's time to find out what exactly you are seeing. If it looks like the example above, it's not too hard to find out which is the root file system. You can see that there are two partitions using partition type 83 (which means they contain a Linux file system). One of them however is only 12 cylinders, and as each cylinder is about 8 MB only, it's too small to contain a root file system. The second partition is using partition type 82, so it contains a swap file system. Therefore, the only partition that can possibly contain the root file system, is /dev/sda3.
  7. Now that you know which partition contains the root file system, it's time to mount it. As mentioned before, it's a good idea to do that on the /mnt directory, Knoppix doesn't use it for anything useful anyway. So in this case, the command to use would be mount /dev/sda3 /mnt
  8. A quick check should show you at this point that you have correctly mounted the root directory. Before you activate the chroot environment, you'll need access to some system directories as well. Most important of them are /proc and /dev. These directories normally are created automatically when booting. That means they do exist in your Knoppix root directory, but once you've changed /mnt to become your new root directory, you'll find them empty. As you really need /proc and /dev to fix your problems, mount them before doing anything else. The next two commands should help you mounting them.
    mount -o bind /dev /mnt/dev
    mount -t proc proc /mnt/proc
    
  9. Once you are at this point, your entire operating system is accessible from /mnt. You can verify this now, by activating the directory (use cd /mnt). At this point your prompt looks like root@Knoppix:/mnt#. Now use the command chroot . to make the current directory (.) your new root directory. This brings you to the real root of everything that is installed on your server's hard drive.
  10. As Linux servers tend to use more than one partition, you may have to mount other partitions as well, before you can really fix all problems. If for instance the directory /usr is on another partition, you won't be able to do anything before you have made that accessible as well. The only task to perform at this moment, is to find out which file system is mounted where exactly. There is however an easy answer to that question: /etc/fstab. In this file you'll see exactly what is mounted when your server normally boots. So check the contents of /etc/fstab and perform all mounts defined in there manually. Or make yourself easy and use mount -a. This command will mount all file systems automatically which haven't been mounted yet.
Now, you'll have full access to all utilities on your server's hard drive, and more important, to all files -- time to analyze what went wrong and restore access. But make sure that you start by using a backup at this point!
To fix any problems on your computer, you have to make sure to restore full access to your system. You can do this by mounting all file systems on your computer, and after that by making them accessible by using the chroot command. This way you are ensured that all tools see the server's file system as it really is, and that will make it a lot easier for you to restore access.

Sunday, January 27, 2019

How to Determine and Fix Boot Issues in Linux


You have acquired some background knowledge that will help you fix Linux boot problems. Here, you'll read what you can do when your computer doesn't boot because of an error in the bootloader GRUB.
To start Linux, you need GRUB. But you may encounter a problem with GRUB that prevents your computer from booting properly. You will know this has occured because one of the following symptoms will be present:
  • GRUB is completely wiped and you see nothing but a blinking cursor when your server boots.
  • GRUB generates a generic GRUB error message
  • GRUB indicates that it cannot find a file it needs.
If you are having GRUB problems, there are two approaches to fix them. You can re-install GRUB and you can try to start your computer by manually entering GRUB in the command line. Let's start by looking how you can re-install GRUB. After that, you'll read how to manually load GRUB if you encounter a GRUB error.
Reinstalling GRUB
If you have a serious problem with the MBR on your computer, it can happen that you only see a blinking cursor at the moment your computer boots. If you have a serious problem with the MBR it is unlikely you have GRUB, therefore, you don't see a GRUB error message. Basically, in that situation it is impossible to boot your computer, so you need a rescue-CD to start it. You can use Knoppix to boot your computer.
Make sure that everything on your hard disk is mounted as described in the article mentioned before, enter a chroot environment and next use the grub-install command to install GRUB again. In case you want to install GRUB in the MBR and the hard disk is addressed by the device file /dev/sda, you would use the command grub-install /dev/sda. This command reads the GRUB configuration file (/boot/grub/menu.lst on most distributions) and based on that, writes the new GRUB bootloader to the MBR. Here is what you will see when using grub-install to re-install GRUB:
root@Knoppix:/# grub-install /dev/sda You shouldn't call/sbin/grub-install.
Please call /usr/sbin/grub-install instead! Searching for GRUB installation
directory ... found: /boot/grub Installation finished. No error reported. This
is the contents of the device map /boot/grub/device.map. Check if this is
correct or not. If any of the lines is incorrect, fix it and re-run the script
'grub-insteall'. (hd0) /dev/sda
Booting manually with GRUB
It's not always necessary to re-install GRUB. If the GRUB code still exists, but due to an issue in the GRUB configuration file you are unable to boot anymore, you can try to reboot manually. This is the best approach if GRUB gives an error message and stops. By entering all GRUB commands manually, you can see exactly where the problem occurs and that helps you in fixing the problem. In the next procedure, you can read how to manually load the GRUB configuration.
  1. To enter the GRUB boot menu, watch carefully what your computer is doing when it boots. In most cases, it shows you have to press the Escape key at the moment GRUB is processed. This brings you to the GRUB command line. Alternatively, you can boot from a rescue CD and enter the command grub to open the GRUB command line interface. Here is an example of this interface.

    Click on image for larger version
    From the GRUB command line interface, it's easy to troubleshoot GRUB.
  2. Fortunately, the GRUB shell offers you help, so that it's not strictly necessary to remember all the right commands. To get an overview of all commands that are available, just type the help command.

    Click on image for larger version
    Type "help" to get an overview of all available commands.
  3. Loading GRUB manually requires entering all of the commands from the /boot/grub/menu.lst file manually. The best approach to do this is to look at the current contents of the menu.lst. You can do that from the GRUB shell by entering the command cat /boot/grub/menu.lst. Somewhere in this file (which may contain lots of comments) you will read what your computer needs to boot.

    Click on image for larger version
    Make sure that you enter the correct commands, display the contents of the menu.lst file to get a good example.
  4. With the example on your computer's monitor, you can manually enter all the GRUB lines. That means that you have to enter the root, kernel and initrd lines. The following three lines give an example of what this could look like:
    root (hd0,0) kernel /boot/vmlinuz-2.6.24-16-server root=/dev/sda2 ro
    splash initrd /boot/initrd-2.6.24-16-server
  5. After entering these commands, your computer awaits further instructions. Basically, that means you have to enter the boot command now. By entering this command, the boot process starts. Monitor it carefully to make sure that there are no errors when booting. As your server refused to boot normally, there are chances that it will give you an error as well if you manually enter the lines from the menu.lst. If it does, make sure to find the error and try booting again, until it works out well.
At the very first stage in the boot procedure, GRUB is loaded. Things can go wrong at that stage, especially if there is an error in the MBR, in the GRUB configuration file itself, or in one of the files that is loaded by GRUB. If that happens, you can enter all the GRUB commands manually to find out what's wrong. If that doesn't work, you can also choose to reinstall GRUB.

Tuesday, January 15, 2019

Ports to be opened to access SMB share in windows from Linux


What Ports Need To Be Open For Samba To Communicate With Other Windows/Linux Systems?

What ports need to be open for Samba to communicate with other windows/linux systems? I need to configure Linux firewall so I need the exact port TCP and UDP port numbers for SMB/CIFS networking protocol. Can you provide me a list of ports along with sample iptables rules?

You can get list of ports from file called /etc/services. For your ease of use here are ports you need to open for two-way samba communication with Windows and Linux desktop systems.
  • netbios-ns – 137/tcp # NETBIOS Name Service
  • netbios-dgm – 138/tcp # NETBIOS Datagram Service
  • netbios-ssn – 139/tcp # NETBIOS session service
  • microsoft-ds – 445/tcp # if you are using Active Directory
Other ports:
  • Port 389 (TCP) – for LDAP (Active Directory Mode)
  • Port 445 (TCP) – NetBIOS was moved to 445 after 2000 and beyond, (CIFS)
  • Port 901 (TCP) – for SWAT service (not related to client communication)

Command To Find Out Required TCP/UDP Ports For SMB/CIFS Networking Protocol

Type the following command:
$ grep -i NETBIOS /etc/services
Sample outputs:
netbios-ns 137/tcp    # NETBIOS Name Service
netbios-ns 137/udp
netbios-dgm 138/tcp    # NETBIOS Datagram Service
netbios-dgm 138/udp
netbios-ssn 139/tcp    # NETBIOS session service
netbios-ssn 139/udp

Sample iptables Rules for CentOS/RHEL 5.x and older

To open Samba communication between 192.168.1.0/24 subnet representing the machines on your network which should operate as clients of the Samba server. Edit /etc/sysconfig/iptables under RHEL/CentOS server. Add the following lines, before the final LOG and ROP lines for the RH-Firewall-1-INPUT chain:
-A RH-Firewall-1-INPUT -s 192.168.1.0/24 -m state --state NEW -p tcp --dport 137 -j ACCEPT
-A RH-Firewall-1-INPUT -s 192.168.1.0/24 -m state --state NEW -p tcp --dport 138 -j ACCEPT
-A RH-Firewall-1-INPUT -s 192.168.1.0/24 -m state --state NEW -p tcp --dport 139 -j ACCEPT
-A RH-Firewall-1-INPUT -s 192.168.1.0/24 -m state --state NEW -p tcp --dport 445 -j ACCEPT
Feel free to change rules as per your setup. Save and close the file. Restart firewall service, enter:
# /sbin/services iptables restart

Sample iptables Rules for CentOS/RHEL 6.x only

-A INPUT -s 192.168.1.0/24 -m state –state NEW -p udp –dport 137 -j ACCEPT
-A INPUT -s 192.168.1.0/24 -m state –state NEW -p udp –dport 138 -j ACCEPT
-A INPUT -s 192.168.1.0/24 -m state –state NEW -p tcp –dport 139 -j ACCEPT
-A INPUT -s 192.168.1.0/24 -m state –state NEW -p tcp –dport 445 -j ACCEPT
Save and close the file. Type the following command to restart the firewall:
service iptables restart

Sample iptables Rules for CentOS/RHEL 7.x only

You need to use the following commands:
# firewall-cmd --permanent --zone=public --add-service=samba
# firewall-cmd --reload

OR
# firewall-cmd --permanent --add-port=137/tcp
# firewall-cmd --permanent --add-port=138/tcp
# firewall-cmd --permanent --add-port=139/tcp
# firewall-cmd --permanent --add-port=445/tcp

Saturday, January 12, 2019

Recover GRUB Boot Issue in CentOS 7

Recover GRUB Boot Loader in CentOS 7

1. On the first step, download the latest version of CentOS 7 ISO image and burn it to a DVD or create a bootable USB stick. Place the bootable image into your machine appropriate drive and reboot the machine.
While the BIOS performs the POSTs tests, press a special key (Esc, F2, F11, F12, Del depending on the motherboard instructions) in order to enter BIOS settings and modify the boot sequence so that the bootable DVD/USB image is booted first at machine start-up, as illustrated in the below image.
System Boot Menu
System Boot Menu
2. After the CentOS 7 bootable media has been detected, the first screen will appear in your machine monitor output. From the first menu choose the Troubleshooting option and press [enter] key to continue.
Select CentOS 7 Troubleshooting
3. On the next screen choose Rescue a CentOS system option and press [enter] key to move further. A new screen will appear with the message ‘Press the Enter key to begin the installation process’. Here, just press [enter] key again to load the CentOS system to memory.
Rescue CentOS 7 System
Rescue CentOS 7Process
4. After the installer software loads into your machine RAM, the rescue environment prompt will appear on your screen. On this prompt type 1 in order to Continue with the system recovery process, as illustrated in the below image.
CentOS 7 Rescue Prompt
5. On the next prompt the rescue program will inform you that your system has been mounted under /mnt/sysimage directory. Here, as the rescue program suggests, type chroot /mnt/sysimage in order to change Linux tree hierarchy from the ISO image to the mounted root partition under your disk.
Mount CentOS 7 Image
6. Next, identify your machine hard drive by issuing the below command in the rescue prompt.
# ls /dev/sd*
In case your machine uses an underlying old physical RAID controller, the disks will have other names, such as /dev/cciss. Also, in case your CentOS system is installed under a virtual machine, the hard disks can be named /dev/vda or /dev/xvda.
However, after you’ve identified your machine hard disk, you can start installing the GRUB boot loader by issuing the below commands.
# ls /sbin | grep grub2  # Identify GRUB installation command
# /sbin/grub2-install /dev/sda  # Install the boot loader in the boot partition of the first hard disk
Install Grub Boot Loader in CentOS 7
7. After the GRUB2 boot loader is successfully installed in your hard disk MBR area, type exit to return to the CentOS boot ISO image tree and reboot the machine by typing init 6 in the console, as illustrated in the below screenshot.
Exit CentOS 7 Grub Prompt
8. After machine restart, you should, first, enter BIOS settings and change the boot order menu (place the hard disk with the installed MBR boot loader on the first position in boot menu order).
Save BIOS settings and, again, reboot the machine to apply the new boot order. After reboot the machine should start directly into the GRUB menu, as shown in the below image.
CentOS 7 Grub Menu
CentOS 7 Grub Menu
Congratulations! You’ve successfully repaired your CentOS 7 system damaged GRUB boot loader. Be aware that sometimes, after restoring the GRUB boot loader, the machine will restart once or twice in order to apply the new grub configuration.

Recover Root Password in CentOS 7

9. If you’ve forgotten the root password and you cannot log in to CentOS 7 system, you can basically reset (blank) the password by booting the CentOS 7 ISO DVD image in recovery mode and follow the same steps as shown above, until you reach step 6. While you’re chrooted into your CentOS installation file system, issue the following command in order to edit Linux accounts password file.
# vi /etc/shadow
In shadow file, identify the root password line (usually is the first line), enter vi edit mode by pressing the i key and delete the entire string in between the first colon “:” and the second colon ”:”, as illustrated in the below screenshot.
Root Encrypted Password
Delete Root Encrypted Password
After you finish, save the file by pressing the following keys in this order Esc -> : -> wq!
10. Finally, exit the chrooted console and type init 6 to reboot the machine. After reboot, login to your CentOS system with the root account, which has no password configured now, and setup a new password for root user by executing the passwd command, as illustrated in the below screenshot.
Set New Root Password in CentOS 7
That’s all! Booting a physical machine or a VM with a CentOS 7 DVD ISO image in recovery mode can help system administrators to perform various troubleshooting tasks for a broken system, such as recovering data or the ones described in the tutorial.

Linux Boot Issue Fix

Learn 5 Simple Tips to Fix Booting Issues in Linux

As for many systems, you can use it every day but it can happen that for some reason, your system doesn't boot and you need to know how you can do in these situations. Some Linux distributions don't offer a safe mode and automatic repair tools but you can see recovery mode which provides some options that keep your files and can repair the problem. There is also another possibility by using a Linux live CD or USB which will help to use tools or commands.

1) Repair Grub2

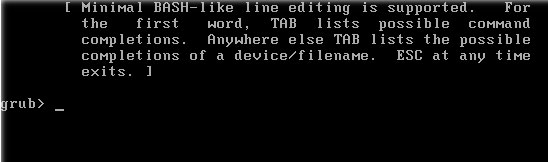
Ubuntu and many other Linux distributions use the GRUB2 boot loader. If GRUB2 breaks for example if you have installed Windows after installing your Ubuntu or overwrite your MBR, you won’t be able to boot into your Linux system. As GRUB 2's ability to fix boot problems has greatly improved over the original GRUB bootloader. I will show you how to repair your GRUB 2 boot issues and specific instructions on how to use the GRUB 2 terminal.
You should use a liveCD. When you will boot in the live mode, then open the terminal and type the command below:
# update-grub2
Generating grub configuration file ...
Found linux image: /boot/vmlinuz-4.10.0-19-generic
Found initrd image: /boot/initrd.img-4.10.0-19-generic
Found memtest86+ image: /boot/memtest86+.elf
Found memtest86+ image: /boot/memtest86+.bin
done
Now you can restart your system. If the operation is not resolved, boot in liveCD mode and install boot repair packages as below
# apt-add-repository ppa:yannubuntu/boot-repair && apt-get update
# apt-get install -y boot-repair && boot-repair
When the boot repair will start, you will follow the step below
Use the recommended repair. The operation can take several minutes so be patient. Follow the given steps. After this, you can restart your system.

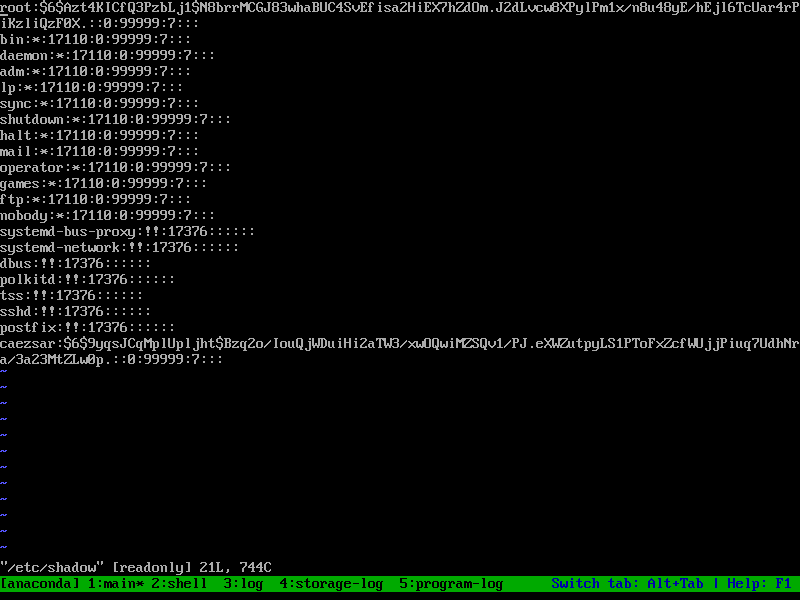
2) Reset a login password forgotten

It can happen that after the boot process, you can't log into your system because you have forgotten your password or maybe you have changed your keyboard language and the input doesn't match the characters you know. The only possibility is to reset your password.
To reset your password, boot in recovery mode and access to the terminal. Enter the command below:
# mount -o remount,rw /
The command above mounts the root partition in read/write mode. Now change your password
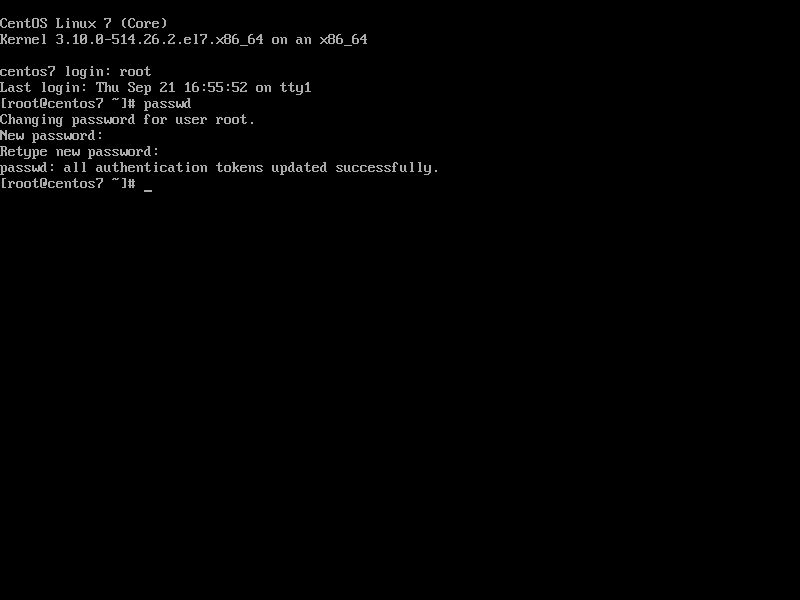
# passwd username
Enter new UNIX password: 
Retype new UNIX password:
If you have SELinux, enter the command below to update its parameters
# touch /.autorelabel
Now you can normally reboot your system and enter the new password

3) Unable to log in: fail to start session

It can happen on the reboot that the screen of your system goes black and soon after that the login screen comes back. This problem can appear because your graphic environment encountered some problems during a package installation or an upgrade. Or it is probably because there is little space on your machine or an issue with LightDM or Xauthority.
To resolve the issue, type the Ctl-Alt-F1 and got the terminal login. Now enter the command below:
# dpkg-reconfigure lightdm

4) View logs system boot messages

The journal is implemented with the jourlnad daemon, which handles all of the messages produced by the kernel, initrd, services, etc. It can help you to see all the errors messages related to the system boot and you can try to resolve it. To see boot-related messages from the current boot, use the -b switch:
# journalctl -b
-- Logs begin at Mon 2017-06-26 16:27:12 WAT, end at Mon 2017-06-26 19:18:50 WAT
Jun 26 16:27:12 ubuntu-pc kernel: Linux version 4.10.0-19-generic (buildd@lcy01-
Jun 26 16:27:12 ubuntu-pc kernel: Command line: BOOT_IMAGE=/boot/vmlinuz-4.10.0-
Jun 26 16:27:12 ubuntu-pc kernel: KERNEL supported cpus:
Jun 26 16:27:12 ubuntu-pc kernel: Intel GenuineIntel
Jun 26 16:27:12 ubuntu-pc kernel: AMD AuthenticAMD
Jun 26 16:27:12 ubuntu-pc kernel: Centaur CentaurHauls
Jun 26 16:27:12 ubuntu-pc kernel: Disabled fast string operations
To see the journal from the previous boot, use the -1 relative pointer with the -b flag
# journalctl -b -1
You can have some issues due to applications. Journald makes easy to take advantage of the advanced features of the journal and to do extensive analysis and relational debugging of different application components.

5) Boot Error on Console

Sometimes it happens on reboot the system gets panic or some error message like "init not found" is displayed, preventing from proper booting, then as a first step you can try pass init=/bin/bash (Grub boot loader) or linux init=/bin/bash (if Lilo boot loader). This will launch you straight into a Bash shell prompt. Then you can remount "/" file system and check /var/log/messages for any error. You can use the below command to remount "/" as read/write. Kernel panic could be because of a bad cpu or motherboard or bad memory.
# mount -o remount,rw /
If the above steps does not work, then next option is to
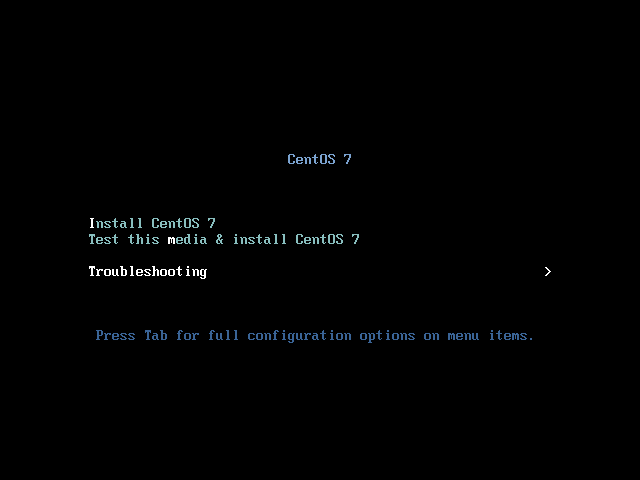
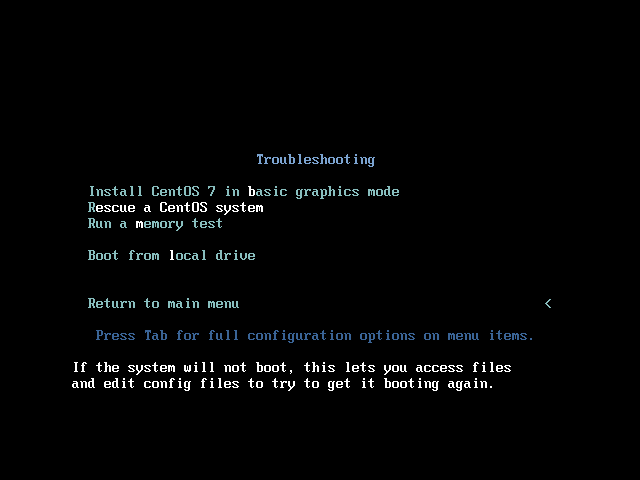
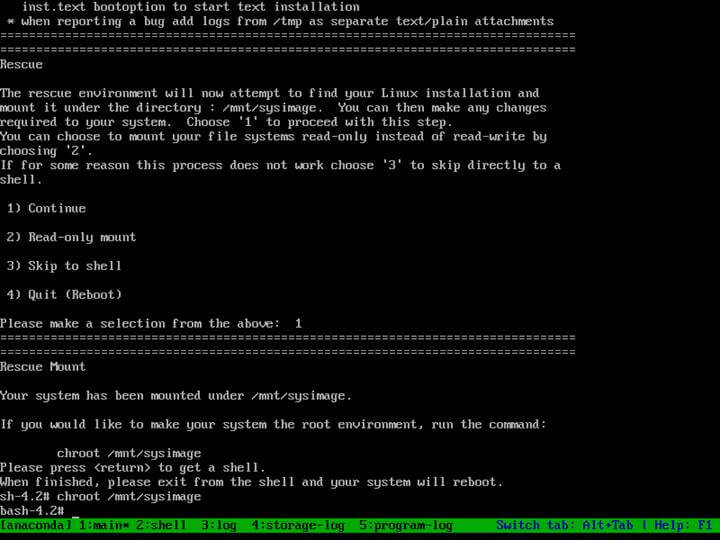
1) Boot from the Linux First CD (boot CD).
2) Type "boot rescue" at Linux boot prompt.
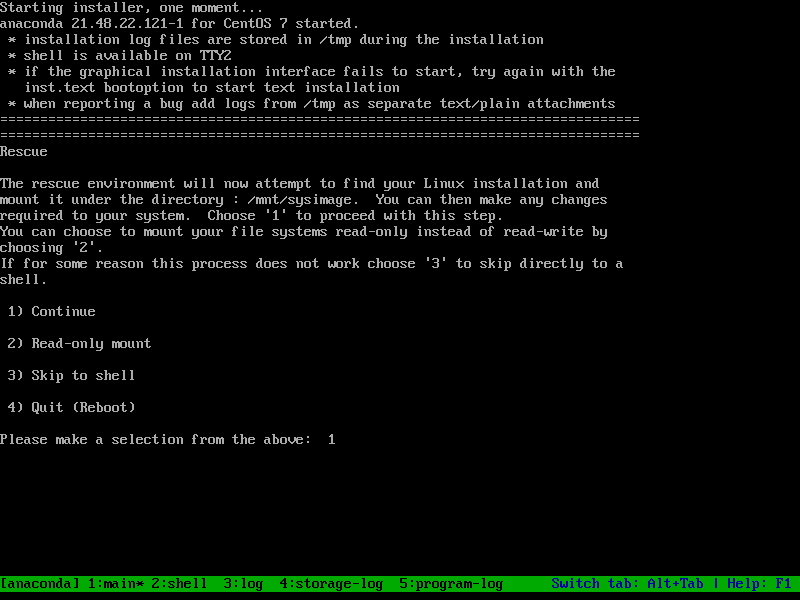
3) After the bash shell prompt show up, type "chroot /mnt/sysimage".
a)  Check for any disk error
# fsck -y /dev/sda2
or
# fsck.ext3 /dev/sda2
Check "fdisk -l /dev/hda" to check how many partitions you have
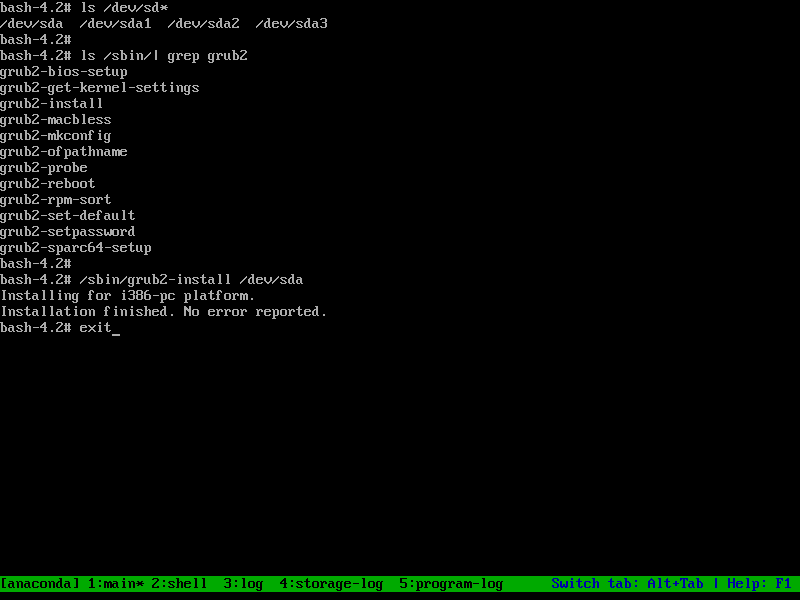
b) If you use Grub boot loader, type "/sbin/grub-install --root-directory=/boot". If you use Lilo bootloader, type "cd /etc; lilo".

Conclusion

LiveCDs such as Ubuntu or Knoppix do the job of rescue booting just fine, but there are smaller, faster rescue boot disks out there. In such situations, knowing how to edit individual GRUB stanzas, use the GRUB command line but you need to be able to identify the problem. By using these techniques, you can recover from various boot problems and boot into your normal installation.